


OpenBuildings Designer is a multidisciplinary building design application that enables BIM workflows to provide information-rich models for the design, analysis, simulation, and documentation of buildings. The application has the largest catalog of manufacturing content. OpenBuildings Designer shares its own catalog of design components across the project team as well as incorporates building components stored in other formats like RFA.
Incorporating OpenBuildings Designer into your workflow is easy as the application supports numerous industry standard formats for graphics and data consolidation, as well as exchange with other BIM and CAD products. Files created from any version of Revit back to 2010 can be imported. OpenBuildings Designer allows you to place RFA (Revit Family) file content.
There are two methods of importing RFA into OpenBuildings Designer:
1. Import to File
2. Import to Catalog
Let’s look at how these two methods are different from each other and the advantages of using these methods.
For a rapid upload, an RFA file can be directly imported to OpenBuildings Designer as a RFA cell. The supported file types are *.rfa, *.paz and *.pac. Follow the steps below to complete the import.
Access from Backstage: File > Import > Exchange File Types > RFA (*.rfa)
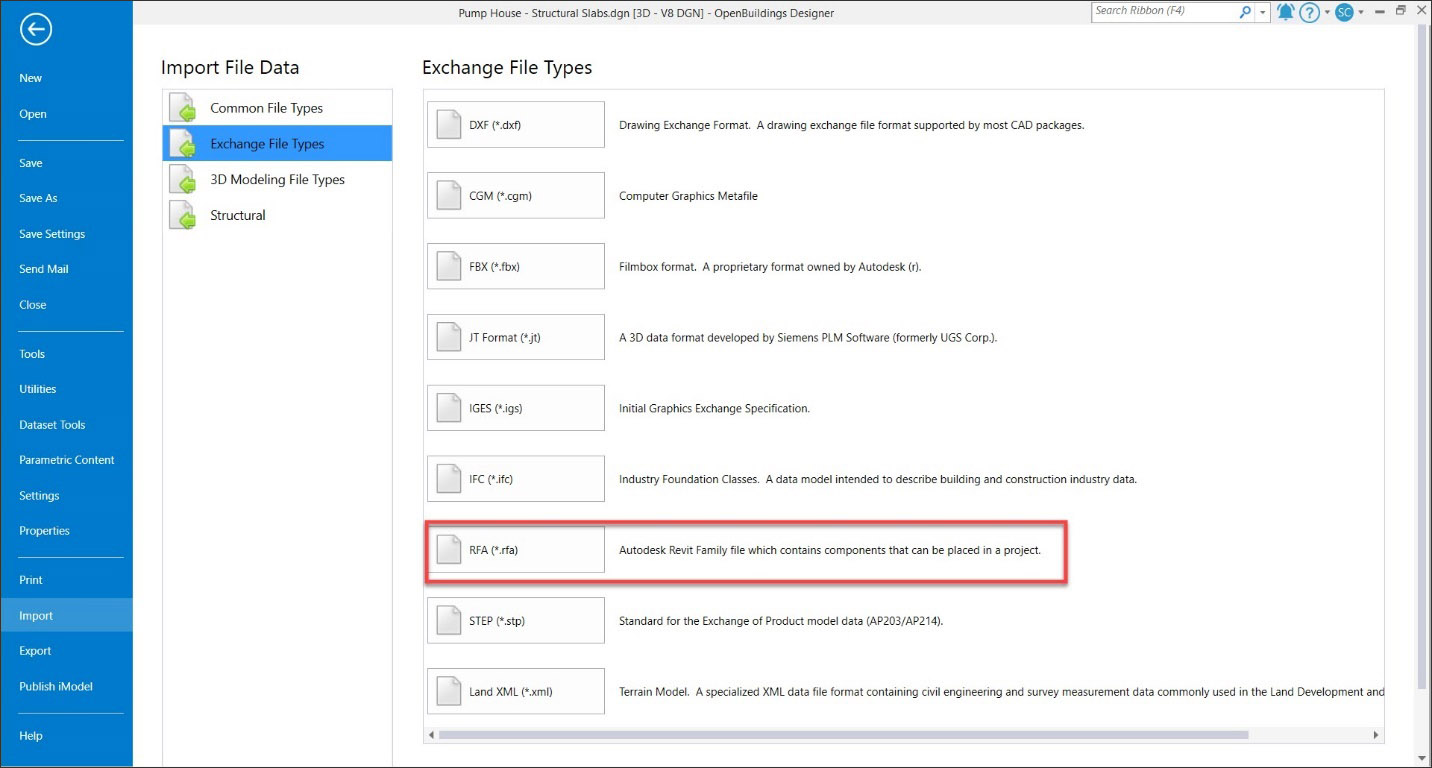
Select the RFA file. Click on OK.
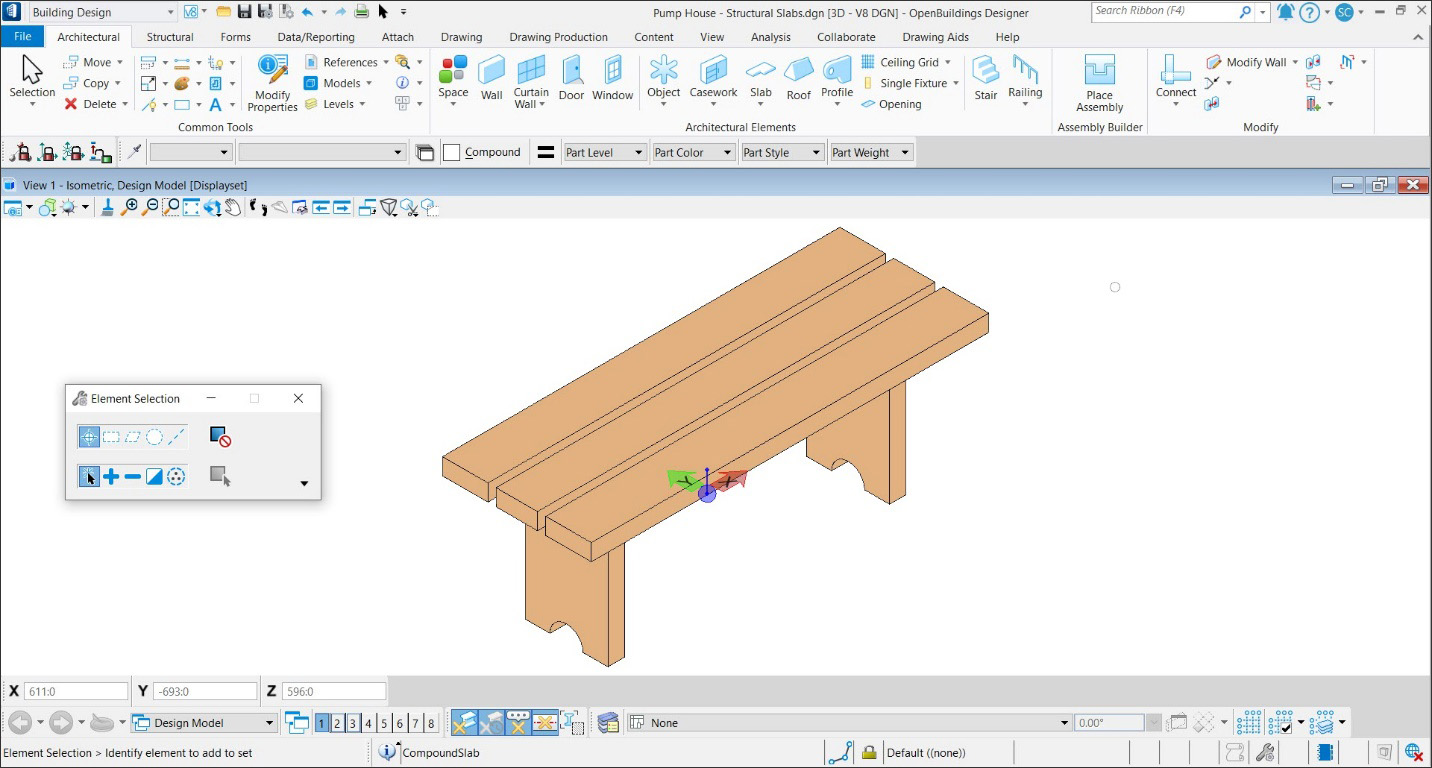
The RFA cell will be placed near the ACS after the import. However, only one element will be placed at a time, and you will not get the choice to select the different variables within the RFA file.
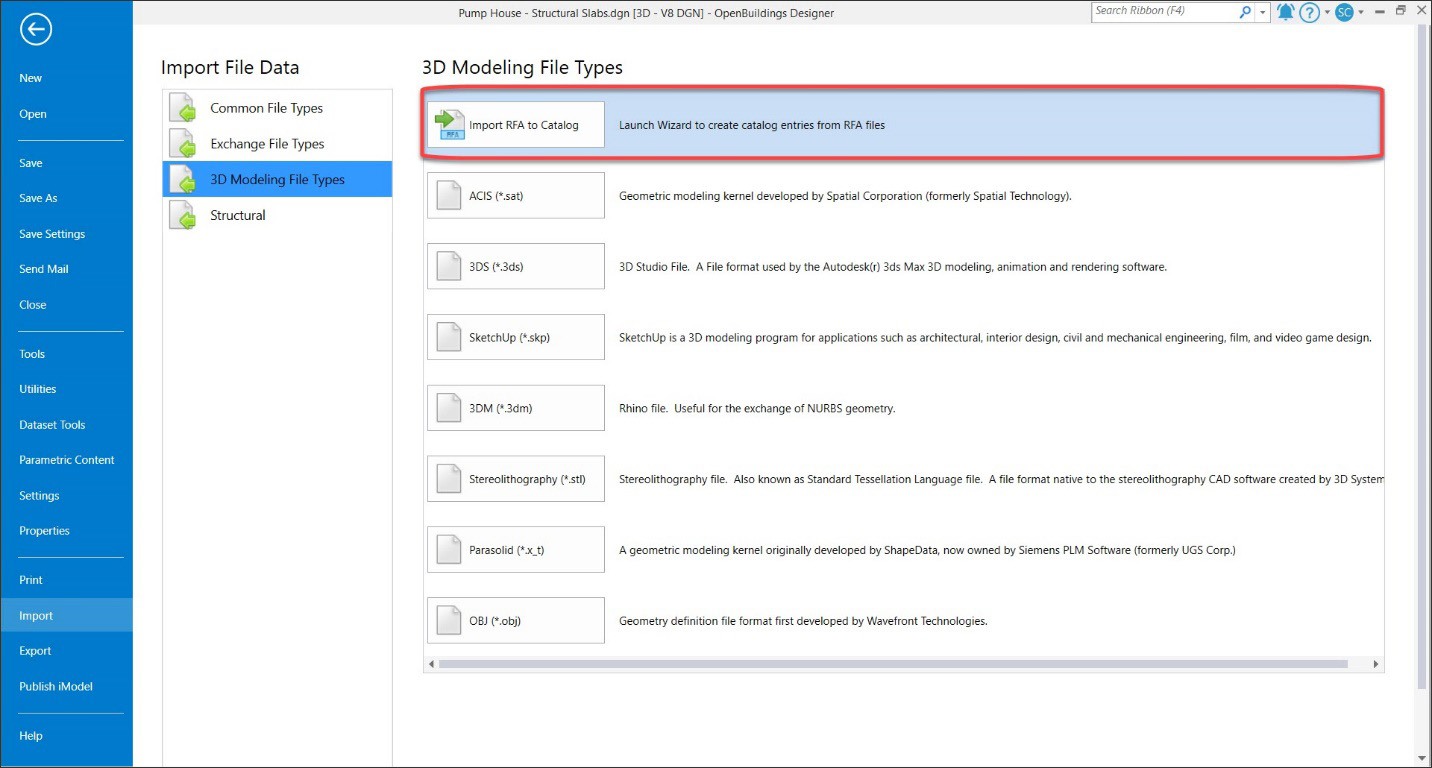
When RFA files are brought into OpenBuildings Designer using this method, the RFA Interpreter Wizard creates catalog entries that represent each type defined in the RFA and stores the mapping settings that are used for each RFA file. Here are the advantages of using the application’s Wizard:
You can access the Wizard from Backstage: File > Import > 3D Modeling File Types > Import RFA to Catalog.
Once the RFA Interpreter Wizard opens, follow the steps listed below.
As you begin, note the commands in the left panel that indicate the current wizard state. They are highlighted in sequence as you move in the workflow of wizard settings. For each command, the dialog controls on the right panel vary.
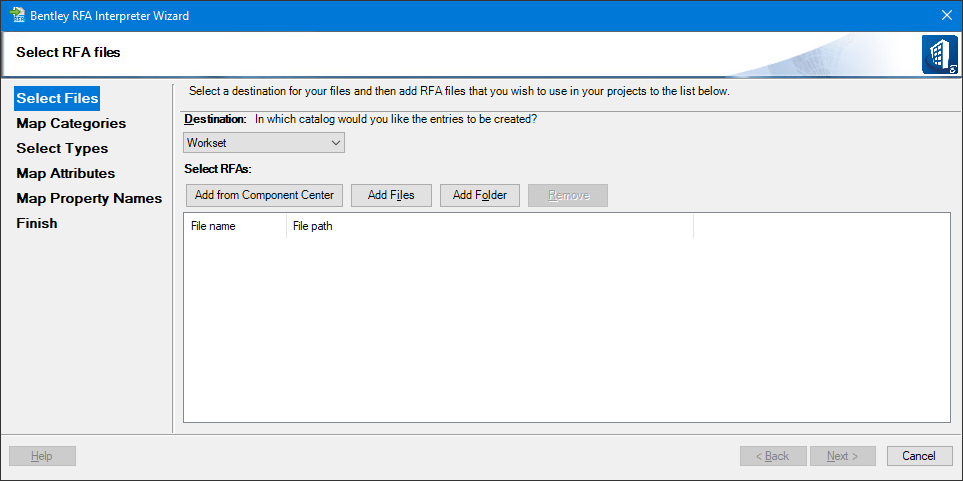
The Select Files command sets the destination for RFA files and selected files or folders to be added in the list. It includes the following options:
The list box displays the selected RFA files added to the Bentley RFA Interpreter.
After selecting one or more RFA files and pressing the Next button, you can begin mapping RFA categories with Building Designer categories or the Mechanical category, then apply valid disciplines to each RFA.
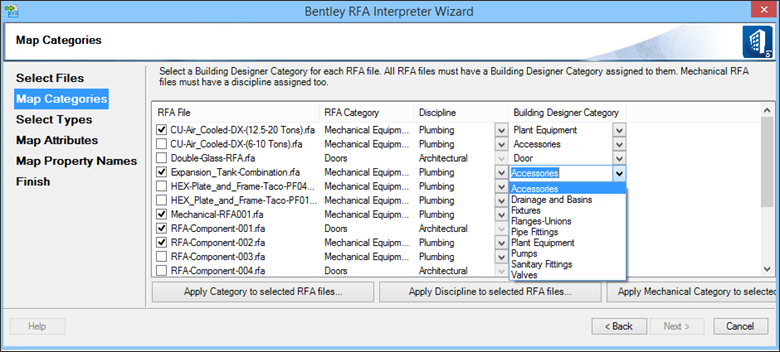
The screen also lists errors, if any, that are encountered in reading RFA data.
The list box has the following columns:
Checking one or more RFA file entries enables the following buttons:
All RFA files must have a Building Designer/Mechanical category and discipline assigned to them. The Wizard helps you by automatically assigning the best possible category and discipline to each RFA.
Now it is time to select the types to include in DataGroup Catalog. You can rename the items to suit your Workset requirements.
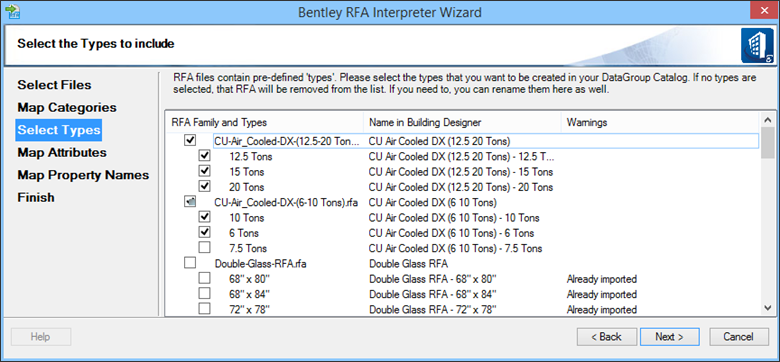
At this point, you will receive warnings that state “already imported” for RFA files that were imported in a past session.
Next, you can map RFA object attributes including Building Designer Part and Family, then assign RFA materials if needed.
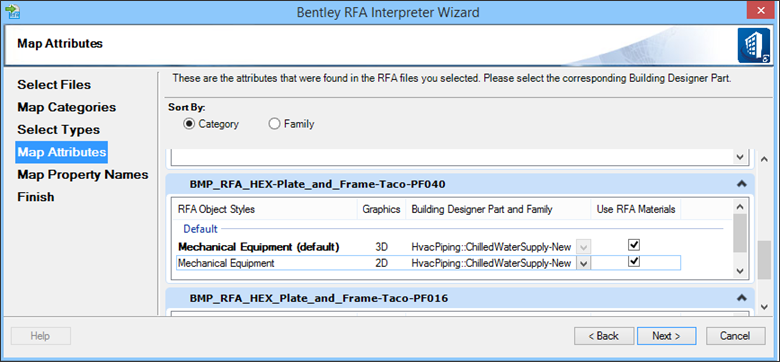
Sort By — Sorts the object list in the order of Category or Family. For each RFA, the list has the following fields:
The Next button becomes available once all RFA object styles are mapped.
This screen maps Building Designer Properties with that of RFA properties. The empty or missing Building Designer Properties can be set manually.
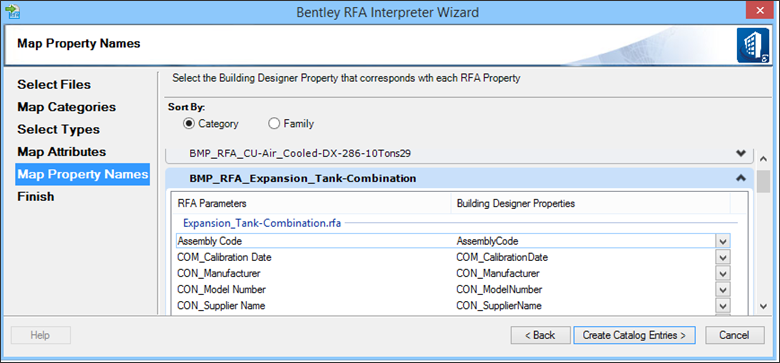
The Create Catalog Entries button appears in place of Next.
In this step, the Wizard automatically interprets and translates the RFA files and reports the result after DataGroup entries are created.
Note: You can, of course, change mapped property settings whenever another window or RFA file is imported. Mappings that are changed from the default are displayed in bold type.
Mapped property settings are stored here: directory \Worksets\<template>\support\dataset\setting\rfawizard.
The Back button remains activated, allowing you to revise the settings in the previous screen as required. The Next button turns active in each state when valid settings are finished, and you can move you to the final screen.
Lastly, after the Create Catalog Entries step is finished, the Finish screen appears and lists the result of the interpretation.
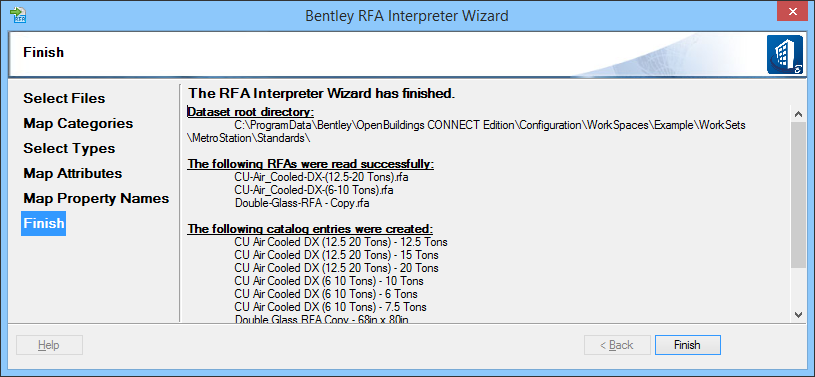
In addition to the dataset root directory path, the result also includes list of RFA files processed, and the resultant catalogs being created. Clicking Finish dismisses the dialog.
This option closes the RFA Interpreter Wizard, prompting a confirmation that you want to exit. No cancellation is permitted after the Create Catalog Entries are progressed.
Lastly, to access your RFA material, go to Ribbon: Place Mechanical / Plumbing Systems > Respective category type.
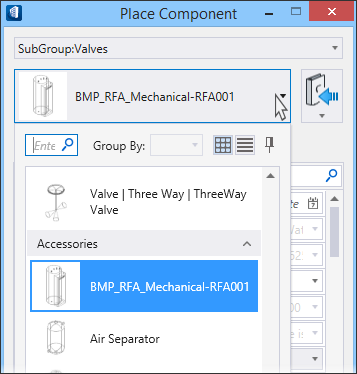
Click to select the respective RFA catalog items in the category.
 Sanchayan Chatterjee is a product success manager for Virtuosity, a Bentley Company. He is an expert with Bentley’s MicroStation, OpenBuildings Designer, LEGION, and LumenRT applications. Sanchayan has trained people from AECOM, WSP, Manipal University, and Singapore Polytechnique University. He is a trained architect and worked with Christopher Charles Benninger Architects as a project architect in the IIM Calcutta and IIT Hyderabad projects.
AECbytes content should not be reproduced on any other website, blog, print publication, or newsletter without permission.

This article captures the highlights of Bentley’s YII 2021 event, which featured award-winning infrastructure projects using cutting-edge technology from all over the world, including the US, UK, Sweden, China, Singapore, Russia, Qatar, and India.

This sponsored article describes how OpenBuildings Designer has the potential to become a significant contributor to the BIM revolution with feature-rich drawing, parametric modelling, and object-based modelling capabilities providing complete flexibility and freedom.
PT. Wijaya Karya (WIKA) describes the implementation of AEC technology on the COVID-19 Modular Hospital in South Jakarta that it was tasked with building in less than a month at the start of the pandemic in 2020.

Given the importance of interoperability in collaboration, it is extremely beneficial to have more options for it in addition to the consortium-developed, consensus-driven IFC file format. The iModel provides such an alternative.